
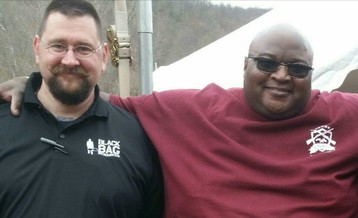
 Two shooters, one chassis. What could possibly go wrong? Two shooters, one chassis. What could possibly go wrong? The Backstory: Tony Simon and I have been friends for nearly two decades, and we talk on the phone almost every day. We share hobbies and interests and we team teach firearms courses together through our respective brands. We often discuss training methods, argue defensive tactics, and of course drool over firearms and related products. Tony is a surplus aficionado, and loves old military guns for both their historical significance and often inexpensive availability, so I wasn't surprised when I heard his enthusiasm about a new product he'd found over the summer, a Canadian manufactured chassis for the venerable SKS- one of Tony's favorites. His enthusiasm grew as he described the features of Matador Arms' Sabertooth chassis and a full length optics rail they also manufacture. While I own an obligatory SKS, I don't share Tony's enthusiasm for the rifle, so I listened with lukewarm interest. Tony wasn't discouraged and continued on with what was beginning to feel like a sales pitch until he dropped his big surprise on me: "Dude, they're sending me one to review!" My ears perked up because "free" is my favorite four letter word, and I knew I'd get to shoot this fancy chassis on Tony's rifle before he had to return it to the manufacturer. Tony lives in NJ, and his rifle wouldn't be state compliant with the chassis and requisite detachable mags installed, so I knew he'd do the build at my house in PA. He'd have to, and I was going to get my share of range time out of the deal! 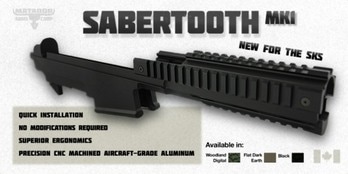 Matador's Sabertooth chasis for the SKS. Matador's Sabertooth chasis for the SKS. A few weeks later, after one of Tony's "The 2nd is for Everyone: Diversity Shoots," he handed me the box with the chassis and optic rail. We looked it over together, and agreed that it looked like a quality piece of work. The Sabertooth chassis is designed to drag the 1940's era SKS kicking and screaming into the 21st century. Much like the EBR concept updated the M-14 to modern standards with a collapsible stock, pistol grip, and rail sections, the Sabertooth adds the same features to the SKS by allowing the attachment of an AR buffer tube and stock, AR pistol grip, and features a magazine well to assist in loading aftermarket "duckbill" magazines into the rifle. The finish on the unit Tony received was also very nice, with a MARPAT type digital woodland camouflage coating which I ribbed Tony about. "Because 'Marine Corps,' right?" Right! (In case you've never spoken to Tony for more than 30 seconds, he was in the Marine Corps, and usually mentions it within the first minute of your first conversation with him.) Tony was excited and showed me the optics rail, too. The rail had crisp cut Picatinny, just like the forearm on the chassis. We noted that they were sharp, and expected that to be a sign of precision. We discussed the required add-ons, and I volunteered a Magpul fixed stock and pistol grip I had from a previous project. We agreed that Tapco 20 round magazines were our best option for the budget we had, as well as a Tapco short vertical grip and extended magazine release. (Since then, Matador has released their own extended magazine release.) We also settled on referring to our undertaking as "Project Sabertooth" on social media, in our written reviews, and on any of the various podcasts with which Tony is involved. 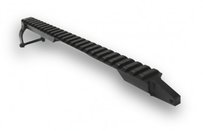 Matador's Full Length Optics Rail Mount. Matador's Full Length Optics Rail Mount. The Build (Almost): Remember when I said Tony loves his surplus guns? His affection for his SKS would be both the motivation to start the project and what nearly killed it. Tony was on cloud nine the day he arrived at my house with his box from Matador and his rifle. We sat down with the instructions and made sure all the small parts, screws, and springs were present, as well as gathered all the tools we'd need. We disassembled Tony's Yugoslavian SKS, and set about installing the Sabertooth chassis. Everything was a snug fit, except for the handguard cap, so we used the buffer supplied by Matador. I told Tony I wasn't sure if it was secure enough, but we'd find out when we shot it. We were pleased to see that Matador included a replacement spring to tension the receiver, stock, and trigger group and carefully snipped it down to the appropriate size per the directions. We threaded on the AR receiver extension, installed the stock, and set the pistol grip block in place. I showed Tony the way it was positioned. "You'll have to remove the pistol grip and block to disassemble the rifle," I told him, "kind of a pain to add extra steps." Tony shrugged it off, stating he didn't mind and probably wouldn't break it down that far very often anyway. I installed the pistol grip and top hand guard and stepped back to look at our work. "Oh, yeeeeaaaaaaah!" was Tony's response, and we laughed. We had certainly put a new dress on the old girl, and she was looking pretty great! Tony pulled out the Matador full length optics rail and chuckled as he read the directions. "Sucks to be you! We should have done this first, so undo all that work you just done did!" he told me, exaggerating his Virginian accent to full bumpkin. We noted that we had to remove Tony's receiver cover pin to install the optics rail, and that's when the trouble started. Tony had already bent a pin punch unsuccessfully attempting to disassemble his hand guard (we planned on getting a replacement gas tube so he wouldn't have to wreck it entirely), and went to work pulling the drift pin that secures the receiver cover pin. Obviously, it didn't work, so we did what all kitchen table gunsmiths do- we went online to look at YouTube. Tony's smile faded as video after video showed cutting the receiver cover pin to remove it. Tony's Yugo is all matching and original, except for a broken firing pin he replaced, and he wasn't about to take a Dremel tool to anything when he was certain "no permanent modifications" were necessary. You and I both know it's just a cheap part that can easily be replaced, but Tony wasn't having it and decided that we'd just review the chassis as best we could without the optics rail. "Besides, we have to get a gas tube anyway, so there's no reason to rush this," he told me. Having given up on the rail, we reinstalled the chassis and took it outside so Tony could get some photos. He took some table top shots, then asked me to get a few of him holding and shouldering the rifle. I held the camera up, he raised the rifle, and immediately dropped it back down. He was smiling, but it wasn't a happy smile. "Sight it," he said, handing me the rifle. I did, and immediately saw the problem- I couldn't line up the sights at all. The receiver cover on the SKS sits above the stock, so your face lines up behind it and your eye in line with the sights. With the Matador Sabertooth chassis, the whole rifle sits lower in the chassis so that the stock is in line with the top of the receiver cover and your eye is above the rear sight. That means you can't possibly align your eye with the rear sight and front sight. The optic rail requires removing the rear sight, so you're dedicated to your optic at that point. You NEED the optic rail to mount a red dot or scope, otherwise you have now way to aim at all. We didn't realize that until it was all assembled. After expressing our frustration and disappointment with language unfit for print, I asked Tony what he was going to do. "Unless you're willing to give up your rifle, we're done here." he responded. I told Tony that this was his project, and I was specific about what my expectations were if I was going to commit one of my guns. He nodded and said he would reach out to his contact at Matador for suggestions on how to proceed. We disassembled the rifle and chassis, carefully repackaged the parts, and put Tony's rifle back together. It had taken us all afternoon, and Tony was going home disappointed. 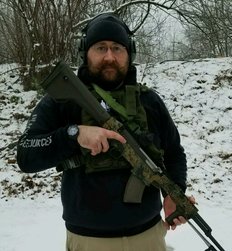 The author with Project Sabertooth. The author with Project Sabertooth. The Build, Round 2: A gentlemen doesn't kiss and tell, so I won't go into all the details, but Tony called me a few days later. "Dust off your SKS. You're up." Unfortunately with our schedules, it would be several weeks before we could get together to make a second attempt at Project Sabertooth. It was November when we finally got together for the project again. Just as before, we rounded up all the parts and my tools, including a Dremel tool this time, and went out to the garage. We laid out our work and disassembled my Romanian SKS. Parodying a popular internet meme, "everybody wants to be a gangster until it's time to do some gangster s***," I winked at Tony and told him "everybody wants to be a gun writer until it's time to chop up your SKS," and unceremoniously zipped off the receiver cover pin with the Dremel! We still managed to assemble then disassemble and reassemble the kit because I was over confident and didn't follow the directions, but the build went together fairly easily. We noticed that my Romanian clunker fit the handguards tighter than Tony's Yugo, and the spring we had cut the first time was fortunately the right length to work with my rifle as well. I added the stock, an OD Green Command Arms Accessories pistol grip to better color match than the black Magpul MOE grip we used the first time, and the Tapco vertical grip and mag release. Matador's instructions say to remove the bayonet, but I was able to keep mine due to it's shorter "paratrooper" length not interfering with the hand guard. It took about 20 minutes, now that we weren't over analyzing every detail and fighting stuck parts. Tony took more photos, and we got our tactical fondle on with the built up rifle. We practiced aiming and changing mags, and agreed that the Sabertooth's mag well makes a huge difference in improving mag insertion. We discussed optics, and I decided that instead of buying anything, I'd give up a Bushnell TRS-25 from an AR pistol build for Project Sabertooth. Unfortunately for Tony, we ran out of time and couldn't get to the range that day, but Project Sabertooth was assembled and we had photos and a basic feel for the kit to post and discuss on social media. Things were finally moving along. 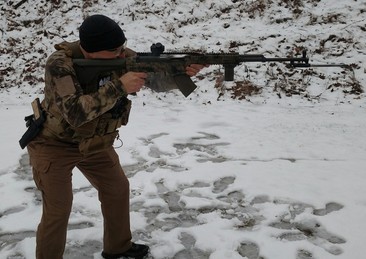 Doc Schoenfeldt rocks Project Sabertooth! Doc Schoenfeldt rocks Project Sabertooth! It's ALIVE!!! A few weeks later, I took Project Sabertooth to the range. Unfortunately, Tony wasn't available, but I had my good friend Brent "Doc" Schoenfeldt with me, and he's an avid shooter in his own right with SWAT experience under his belt. Doc's got plenty of time on the various ARs he's built, several AKs, and various other models in his collection, but his total experience with the SKS was limited to one range trip where he shot Tony's Yugo. There was snow on the ground and it was cold and raining, but we were happy to run drills with a pair of custom 1911s Doc built as well as our ARs. We were well warmed up when I brought out Project Sabertooth. Doc was already familiar with the backstory, and was eager to get his hands on it. I installed the Bushnell TRS-25 there at the range, and joked that I'd need at least a few rounds to get it zeroed on the 35 yard range we were using. I brought a few hundred round of Tulammo FMJ and we started loading it into the Tapco 20 round magazines. We noticed right away that the magazines were having feeding issues. The springs or followers were sticking, preventing the rounds from pushing up. We worked on the mags for a bit to get them to loosen up, settling on the fact that they seemed to work when loaded to less than 15 rounds. Once we were satisfied that the mags would feed the rifle, I seated one and took aim at the steel plate 25 yards away. 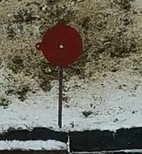 You didn't believe me, did you? You didn't believe me, did you? Sometimes it's better to be lucky than good, and that first round hit dead center on the steel plate without having to make any adjustments on the Bushnell! Doc and I had a good laugh at my good fortune, and I spent the next few magazines piling rounds on top of the original mark on Doc's plate. Doc took the rifle from me and did the same with boring regularity and ease. 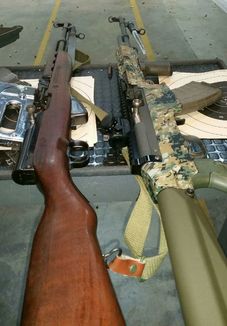 Tony's Yugo with Project Sabertooth. Tony's Yugo with Project Sabertooth. Tony Takes a Turn I was nearly finished writing up this article, and something was eating at me. Tony started this project and was certainly passionate about it, but never had the opportunity to really enjoy the fruits of our labor. Tony needed to shoot Project Sabertooth. Tony had used the Heritage Guild in Easton to do a hands on evaluation with another rifle recently, and, as their range is only 15 minutes from my house, I suggested he meet me there in two days. I brought the rifle, three magazines, and a few boxes of ammo. Tony brought his stock Yugo for comparison. As if he wasn't familiar with it enough, Tony ran a few rounds through his SKS, while I loaded mags for Project Sabertooth. I explained the issues I'd experienced with the mags, and Tony looked them over. It took a few rounds (and a little lubrication on the bolt), but once Project Sabertooth started running smooth, Tony was smiling from ear to ear. "Oh, this is great," he commented, referencing the rail and optic. He brought the rifle to low ready, then snapped it up and fired a controlled pair. He repeated the exercise a few times until the mag ran dry, and offered me a turn. I glanced over my shoulder at Tony as I picked up the rifle, executed a mag load and charged the action using a technique polpular with AK shooters. "Niiiiiiice," Tony chuckled, recognizing that I was demonstrating Project Sabertooth was now as "high speed" as other more modern rifles. I ran through a few rounds before putting Tony back on the gun, and he burned through a few more boxes of 7.62. We wrapped up another project I've been working on, spoke with staff about Tony's upcoming events, and went back to my house to debrief. 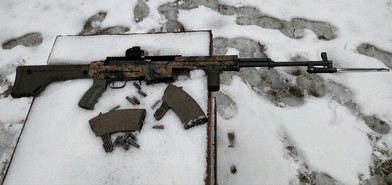 Project Sabertooth in it's natural environment. Project Sabertooth in it's natural environment. The Good, the Bad, and the Ugly The chassis: We put a few hundred rounds through the rifle, shooting from standing, kneeling, and prone, and the Sabertooth chassis was comfortable in all three positions. Tony and I are both over six feet tall, so the long fixed stock was comfortable for both of us, but Doc is shorter and said he would prefer a collapsible stock, specifically the Mission First Tactical Minimalist stock (Doc's hints aren't subtle), to allow adjustment for his smaller stature. This is of course a possibility, only requiring a swap of the buffer tube and stock. I expressed concerns over the gap between the pistol grip and trigger guard, but it proved to be a non issue, and Tony commented that it allows for actuating the SKS safety lever. The rails are sharp and the accessories we mounted stayed secure through several hundred rounds of fire. I recommend rail covers, and I'd like to see Matador offer a QD socket somewhere either on the rails or elsewhere on the chassis. I thought the front of the chassis had moved at one point, but upon closer inspection it was an illusion due to the shape of the hand guard cap. The chassis stayed put, which is no small feat for a drop in accessory for any surplus firearm, especially one with as many variants as the SKS. We all agreed that the rifle felt heavier with the Sabertooth installed, but the minor added weight only served to tame an already reasonable recoil. The pairing of the straight recoiling SKS with the improved ergonomics of the chassis and increased weight make shooting a Sabertooth equipped SKS a real joy. Similarly, we all agreed that the Sabertooth's magwell made loading detachable magazines significantly faster and easier than compared to a traditional stock. This was hands down the most dramatic difference in the manual of arms for all three of us, and we all agreed that it makes the chassis worth the price of admission. The optic rail mount: Again, we chose the Bushnell TRS-25 for our Project Sabertooth and it sits on Matador's rail at a perfect height without the riser. The consensus was that this is the highlight of the build. Shooting the SKS with a modern optic is fantastic, and the Matador rail does an excellent job of providing a long, straight, flat, and consistent platform for the optic of your choice. Cutting the receiver cover pin is only an issue to absolute purists like Tony, and replacement parts are cheap and plentiful should you lose your sense and decide to get rid of the Matador rail. Accessories: The only thing worth noting here is that the detachable magazine is always the weak link in any firearm that uses them. This case was no exception, but once we got our Tapco 20 round magazines broken in (and kept the rifle properly lubricated), everything worked flawlessly. Tony and I have spoken about getting a few test magazines from other manufacturers, and we will follow up with a review on those after running them in Project Sabertooth. Opinions: All three reviewers agreed that the Matador Sabertooth chassis and full length optics rail are well worth the asking price and made significant improvements to the SKS in ergonomics, functionality, and shootability. They are easy to install, and the chassis allows you to customize as you see fit with the plethora of AR stocks and pistol grips on the market. We all agreed that adding an optic was our favorite "new" feature on the SKS for the pure ease of use and enjoyment in shooting. Second favorite was the improved ease and speed of changing magazines thanks to the Sabertooth's magwell. Over all, we struggled to find anything to complain about, and any complaints we had were minor and not deal breakers or really worth mentioning. In discussing the build with others, the question repeatedly came up as to whether or not Tony and I felt it was worth adding another $260 for the chassis and $90 for the optics rail PLUS the other parts necessary to finish the build. Tony and I agreed, that yes it is, but that is ultimately up to the end user. Some people might not see the value in buying a $400 (current local price at the time of this writing) surplus SKS then adding another $400 in parts and accessories compared to purchasing another rifle in the same caliber. Other collectors who bought their SKS for $99 back in the 90's might have an "extra" rifle they feel like turning into an awesome project gun. The other idea is that some people may face legislative issues that preclude them from owning other modern rifles, but they can update their SKS without running afoul of restrictions. I think the last scenario is one where the Matador chassis and rail make the most sense to prospective customers. Regardless of the reason you choose the Matador Sabertooth chassis and Matador Full Length Optics Rail Mount, you are sure to end with an impressively updated and more capable rifle using these excellent components. 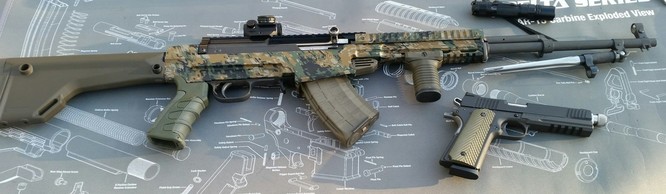 A pair of updated classics: the Project Sabertooth SKS and a custom 1911.  Black Bag Resources encourages you to join the National Rifle Association.
0 Comments
|
Black Bag Resources Blog
News, projects, products, and tips from the owner. Archives
September 2022
Categories
All
|
 RSS Feed